Introduction to the College
For the first day of our new unit after meeting and going over a few of the unit guide lines we grouped up into 8 groups of 5.
In these groups we were handed the brief to make a 'window box' within our group using certain materials given to us by our tutors.
The whole idea of the day was to work within a workshop created by our tutors to see how we worked within a group.
We started off by reading the brief and making a mind map on the word an idea of a 'window box'

Initial ideas of a window box is the literal idea of it being for flowers. In our group we are all Textiles students but are based in other textiles worlds and we wanted to show this through out our ideas and planning of our own workshop
after discussing we decided to use the literal idea of flowery window boxes, however let the materials guide our way of working, after finding suitable materials we expanded from this creating a range of child like different window boxes.

Finished Product
7 Individual window boxes all joined together to create something unique that had small bits of everyone elses personality and sense of style to them.
For me this was a very good task and helped me get straight into the project. There were a few difficulties and compromises when starting due to us all being different textiles students we all work in different styles, sizes and to all decide on one was a challenge however it was over come by mutual agreements that the smaller style would look better for what we were trying to achieve. There were small issues with the finalization of the product, however these were overcome with patience and alot of glue.
Evaluations of our final product

These were what we come up with as a group. I found this to be very helpful as it shows us what we need to work on and improve for next time. However I think overall the workshop went really well and showed us how crucial it is to actually try your workshop out before you present it to a group of people due to small errors that you cannot see or predict.
After doing this we were asked to deconstruct someone elses final product and evaluate what they could have improved on and what issues there would be with there idea.
We were given 'Dino Dig'

'Dino Dig' was a really good idea but after we worked into the workshop and thought about the possibilities and what could be improved on we came up with a ideas.

We then after deconstructing there workshop we had to put it back together again adding our inputs.

This was a really good way of working as it showed development and how you can always improve on an idea and how it is good for outsider feedback.
Lynn Setterington Lecture Notes.


Lynn was is already an inspiration to me due to her being my tutor at university, however this lecture opened my eyes to how much work in the community and public work that she does. I loved learning more about what she has achieved and different ways she has worked within the community it sparked a passion for me to want to be able to work like this when I graduate.

Some of Lynn's inspirational projects.
'Please Sign Here'
This project explores Rochdale through the signatures of its current citizens. It evolved following the discovery of a 1895 signature quilt in the Rochdale archives.

'Remembering Emily'
This recent collaborative signature cloth marks the centenary of the death of Emily Wilding Davison at the Epsom Derby in June 1913

Child Protection & Testing your Workshop Session

Due to me being poorly with tonsillitis throughout these workshops I've had to work from peers notes and what they have told me about there day. I did my own research into child protection and read through the 'MANCHESTER METROPOLITAN UNIVERSITY CHILD PROTECTION POLICY'
Peer notes and help understanding the policy
Make sure a register is always taken. Always be aware of open environments. Always avoid physical contact. Silence isn't an option always Report potential concerns. Never invite children to socialise. Always get permission before taking photographs.
From these notes I and research I have realised how important the child protection act is.
Due to me being off for 2 weeks I feel I missed out on crucial parts of the course, for example missing the Manchester Art Gallery trip and missing the workshop with Avril Neagle. However I have caught up daily with peers and have been kept up to date with what has been going on. I also got sent information on planning a workshop.
Research - End of week 2
I chose to do college 1 to give me a
brief insight into my different options that I could take when finishing my
degree. So far during these first two weeks the course has really opened my
eyes into the world of teaching. There are so many options and choices that I
have never considered before. I found the first exercise of window boxes to be
the most effective in opening my mind into this different way of thinking. Planning and efficiency have been something
that have stood out so far on the course. I believe there is a lot of work and
background thinking to teaching that you wouldn’t necessarily think about. For example during the first window box
session breaking down peoples workshops and planning our own straight away I thought
was an amazing idea as it put you straight into the position of being a teacher
and opened our minds to all the complications and issues you would come across for
example, child safety, CPR checks, time management. Another excellent part of these first weeks
was being able to listen to Lynn Setteringtons lecture on herself and her work
within the community, from a young age I have always thought about how exciting
it would be to work doing workshops within different schools and with the
community as its been something I have always been involved with from a young
age. Throughout my life I have actively volunteered and been put forward for so
many exciting workshops and to be able to listen to how Lynn sets up and
organises her workshops it was inspiring and added to the idea of choosing this
career path. Lynns work is very similar to mine as we are both in the textiles
work of embroidery and she for me has been a mentor throughout university, so
this opportunity was really helpful. I then left this lecture feeling inspired
and researched more into Lynns practice and I took elements of her work for my
own personal artist research for example, the workshop entitled ‘please sign
here’ is something I loved, embroidering your name into a large tapestry. This
is something I would love to do to teach my skill of being an embroiderer to
others. It helped me to think what aspects of my work could I teach it also
boosts your confidence as you believe you have a skill worth teaching . Child
safety has also been something educational I have learnt in these first weeks
due to me being poorly I had to depend on other peoples notes and information,
but me researching this topic myself was interesting and challenging. So far
the course is really opening my eyes and is influencing my career choice. However
I am still very wary of going into a school as I don’t yet feel confident
enough but I believe with the help throughout the course this is something I
will overcome.
Holy Name Primary School- Window Box Brief
ANTARCTICA & BRAZIL
As a group we wanted to try and make the workshop fun enjoyable and educational. We decided on working with two contrasting countries to fit the brief of 'create your own unusual animal'. By choosing Antarctica and Brazil we thought this would teach the children about two completely different countries, climates and habitats.
Throughout the planning our group was very organised and we worked well together using social media sites such as facebook to connect and share ideas and work we had done with each other.
The resourcing of the materials for the workshop was also very well organised as we all put equal money in and bought needed materials.
We started planning the workshop with different ideas based around the Brazil & Antarctica theme;

We then began collecting materials;


#
By making the workshop more educational we decided to add a map of the world with which the students could discuss were they though the countries were in the world.

We also wanted to create visuals to help the pupils understand the different countries so we made mood boards for each country to help the pupils be more creative with the animals they create.


We used social media sites to help communicate about ideas and prices of printing with the mood boards
By creating these mood boards we give the pupils chance to look and create there own animal with a suitable habitat also these will help give inspiration on some things pupils may struggle with such as colour and imagination.
We then went onto helping the pupils design there animals using a worksheet.

From all of these we then started to create our lesson plans.
First basic outline of the lesson plan
Aims: Create a 'thing' based on an environment using the mood board provided.
Objectives: To learn about different plants, animals and their habitats and encourage a creative and imaginative outcome. To encourage open discussion through prompts such as mood boards, sounds and helper questions.
Plan
10mins Introduction to us and brief idea of what we are going to do, nothing too tailored as we want don't wan't to stifle creativity with a particular preferred outcome. Split into non friendship groups and hand out mood boards onto tables (2 Antarctica and 2 Brazil) Each table will be asked to come up one at a time to pick materials and return back to the table to look at the mood board.
10mins Introduction to us and brief idea of what we are going to do, nothing too tailored as we want don't wan't to stifle creativity with a particular preferred outcome. Split into non friendship groups and hand out mood boards onto tables (2 Antarctica and 2 Brazil) Each table will be asked to come up one at a time to pick materials and return back to the table to look at the mood board.
20-30 mins of making and discussion within the tables (task 1 to create an animal 'thing')
10 mins change and look around at what is being made. Ask questions.
20-30 mins of making and discussion within the tables (task 2 to create a plant 'thing')
20 mins discussion on what has been created and putting together in the window box
10 mins clearing up time
Material list - we have began to source these for ourselves but any additions would be welcome
Natural- Leaves, twigs etc. (Collecting ourselves)
Plastic Bottles (Collecting ourselves)
Googly eyes (Collecting ourselves)
Pipe Cleaners (Collecting ourselves)
Wool/Yarn (Collecting ourselves)
Tissue Paper
Glue P.V.A
Scissors 15 right 5 left
Masking Tape
CD Player
Natural- Leaves, twigs etc. (Collecting ourselves)
Plastic Bottles (Collecting ourselves)
Googly eyes (Collecting ourselves)
Pipe Cleaners (Collecting ourselves)
Wool/Yarn (Collecting ourselves)
Tissue Paper
Glue P.V.A
Scissors 15 right 5 left
Masking Tape
CD Player
Using social media websites again (facebook) and the help of our tutors we edited the lesson plan a few times until everyone was happy and everything was clear. Charlotte was very helpful in the group and took alot of the responsibility on herself. Without Charlottes amazing organisational skills I think our workshop would have been alot more difficult.


The finalised lesson plan.
Lesson Plan: Window Box Brief, Holy Name Primary 2nd
April
1-3pm
Setting up
·
Have the materials split for each group (6) also
allowing for the swap over. (So hold some back for the next groups.)
·
Place the mood boards centre of the table with
design sheet placed for each pupil.
·
Make sure all of the team have prompt sheets and
additional for the staff to use.
·
Have the selection of words scattered around the
table on the mood board.
·
Have a box set out for each table which they
take with them and for the second country (12)
Antarctica Brazil
Time Management (Run over)
·
Margherita Murgia
Regan Mcphilbin Charlotte
Thompson □ = Leader ( Go to person)
·
Holly
Bowden Suzanne Valerie
·
Shannon
Quirke Amy Bamford
·
Beth
Riley Charlotte Smith
Introduction (5 Min)
·
Objectives/aim – make an environment and
creatures to suit your country
·
Safety -
working with scissors, cautious of edges, and Respect for others but still be creative
and enjoy yourself
·
Mention use of camera for photographs to
document your work and creative process
·
I will use the frog to indicate when to stop
what you’re doing and listen to instructions (so listen out for the frog). Give
example.
Split into
Groups (Counting 1-6, so that they are split up) Groups, 1,2,3 Brazil and
4,5,6, Antarctica.
During the session we may have animal
noises on a cd on a loop which we could re-enact at the end.
Activity (1 Hour 40,
split into sections + Tidy up)
·
Show them the map to where their country is; use
the mood board on the table to conjure up ideas for creations of environments
and creatures (relating to country). Use prompts for advice. The pupils can use
the design sheet to make a character by drawing or using words to describe ie.
Fluffy, scary, friendly, hot, cold. (5
Min)
·
Leader will Announce when to move on
·
Use the materials to create an animal/creature
for the environment you conjured up in the design/mood board session, can make
more than one and don’t have to stick to the previous design! show techniques
by making your own alongside them whilst assisting (Not aiming to finish yours
just show techniques with materials for inspiration) (15 Min)
·
Leader will Announce when to move on
·
Again use the materials to this time produce
plants/rocks/ice/flowers to accompany your creatures/creations, again can make
more than one (Show examples as go along) (15Min)
·
Will Announce to finalise Object
·
Use this to place all items made in box
(finished or unfinished) and decorate the box with leaves which have been
painted. (10 Min)
·
Towards end, Will announce to swap to the other country,
keeping in groups. (Move box to the front.
·
Show country, Mood board and design plan as
above (5 Min)
·
Leader will Announce when to move on
·
Make animal/creature, like before (15 Min)
·
Leader will Announce when to move on
·
Make environment (15 Min)
·
Will Announce to object
·
Put items in box, decorate (10
Min)
·
Announce quick Tidy up (10 Min) Place boxes at the
front.
·
Announce Return to tables
·
Give Instruction One country (3 groups) get given post
it notes to come up and write a positive descriptive word about a box ie,
colourful, exciting, fun. (5Min) Whilst other is talking about what they made,
giving it a name, where’s it live, what’s it eat (Personifying) or Give post it
to think about what to write.
·
Give Instruction The group standing sits to discuss
their pieces: are they pleased with the creations? Whilst the other group comes
up and places post it’s around the boxes. (5 Min)
·
Give Instruction Then we all come together to gather
feedback, did we have fun? Pick a country, choose animal from country, ie.
Monkey or seal then all make noise together after count of three. Then walk around the classroom like you think
your animal would, (5min)
·
Gather one last time, Say Thank you for having us and
we have hoped you have enjoyed the day; You’ve managed to use recycled and
limited (not a lot of) materials, to create amazing creatures which live in perfectly
suitable environments, well done to everyone, you’ve done a brilliant job.
Materials
Googly eyes (Collecting ourselves)
Pipe Cleaners (Collecting ourselves)
Wool/Yarn (Collecting ourselves)
Tissue Paper
Pom poms
Glue P.V.A
Scissors
Masking Tape
CD Player
Mood board
Design sheet
tape
map
Plastic Bottles
Abraham High School - Window Box Brief
'Zombie Apocalypse'
For this brief and school we had under an hour to sit and work as a very large group to plan. It seemed like it was never going to work due to the amount of people with different ideas who wanted to put there view across! We sat in a long table and split into 5 groups of 5, gathered our ideas then spoke them to the group. There were many ideas from working with seasons but the one idea that sprung out to everyone was making a window box a useful item..
We wanted to make the workshop fun and exciting, as ideas were flowing peoples confidence and enthusiasm about the workshop were becoming more excited, people were giving ideas of dressing up as zombies, some wearing boiler suits, these fun ideas made it more exciting for us to want to do the workshop. More ideas were thrown around until we decided on a good idea of making a 'survival box'. From this idea we stemmed into different groups.
We had 4 groups from this concentrating on different areas of the workshop;
-Artist Research / Special Collections
-Ideas & Making
-Conclusion & Performance
-Structure & Organisation
Having different groups working on different areas of the workshop was really helpful as it made sure each area of the workshop was covered and it narrowed down everyone's ideas and jobs lists.
For a group this large there was times when we needed someone to interveen and say this isnt working and this could possibly be done better by doing this.. This is were it was helpful to have help of our tutors.
I was in the group of 'Ideas & Making' for me this was perfect as I was given the role of a 'maker' so my job was to sit and help the students with creative thoughts and give examples of different things they could possibly make.
As soon as we all decided to call it a day everyone in the group was very productive.
Posters were designed that night.

We set up a facebook group, this being our way of group communication
Zombie Apocalypse Workshop Plan #1
Documentations:
risk assessments for using equipment such as hot glue gun, cans and walking
between the making room and special collections.
Resources: Recycled materials.
Aims: To explore new ways of thinking and making.
Objectives: To create useful apocalypse surviving objects from limited recycled
materials.
Time
|
Length
|
Topic
|
Activity
|
Resources
|
10:05
|
15 mins
|
introduction and presentation
|
-
Introduction into ourselves
and short presentation on different artists who use recycling in their work.
-
assign groups 1-4 and
separate.
|
presentation
|
10:20
|
25 mins
|
Special collations visit
|
- Looking at multiple artworks that relates to recycling materials/apocalypse and
analyzing them as a group.
|
specials collections archive
|
10:45
|
25 mins
|
Defense
|
-You are in a house; zombies are coming to get you! You
have 20 minutes to make an item out of these paper materials that you can use
to defend yourself with! GO!
|
-Newspaper
-an assortment of papers
|
11:10
|
25 mins
|
Contraband
|
-Zombies are attracted to chocolate! You need to make a
contraption to hide your contraband. Think about concealing not only the
appearance of the chocolate but also the smell of it! GO!
|
-
Can’s
-
scissors
|
11:35
|
25 mins
|
Power
|
-The power has gone! The zombies have taken over the power
station. You need to create an object that generates power. Think about wind
turbines and solar panels for inspiration! GO!
|
-
Plastic bottles
-
scissors
|
12:00
|
1 hour
|
LUNCH
|
LUNCH
|
LUNCH
|
13:00
|
30 mins
|
Personal object
|
-You have become a lot weaker due to the radiation and it
is now affecting your mobility. Pick a word out of the box (handicaps
–examples, use one arm/ shut one eye)… This is your handicap! Now make a
personal comforting object that reminds you of home! GO!
|
- natural materials
|
13:30
|
30 mins
|
testing products
|
-
test all the products made
-
simulate a line up and a contraband check and other scenarios
|
-all work made
|
14:00
|
30 mins
|
Feedback and
completion
|
-
Discuss the day, what they
have learnt and what they enjoyed the most.
-
fill out the feedback form.
-
present with the certificate
to say they are fully trained.
|
feedback form
presented with a
“you now have all the skills to survive a mmu apocalypse”
certificate.
|
Social Media (Facebook)
The facebook group was very helpful in sharing ideas. It was easy to post ideas and keep in contact for simple things such as materials lists, lesson plans, amended lesson plans and information sent by tutors.

Materials list.

Scenario Planning

Problem solving and corrections on the workshop


Final lesson plan with finalised scenarios for each table.
Documentations:
risk assessments for using equipment such as hot glue gun, cans and walking between the making room and special collections.
Resources: Recycled materials.
Aims: To explore new ways of thinkin g and making.
Objectives: To create useful apocalypse surviving objects
from limited recycled materials looking at adhocism ways. Using the idea of a
window box to hold items to survive a zombie apocalypse.
Time
|
Length
|
Topic
|
Activity
|
Resources
|
10:05
|
15 mins
|
introduction and presentation
|
- Introduction into ourselves. Using a
scenario? Why are we living in a zombie apocalypse? Why do we only have
limited resources? Perhaps ‘set design’ the workshop room?
- Short presentation on different
artists who use recycling in their work. In the same style, perhaps introduce
these artists as innovators who foresaw the apocalypse? It would be great to
stay in character/scenario all day
- assign groups 1-4 and separate.
|
Presentation
|
10:20
|
25 mins
|
Special Collections visit rotation
|
- Looking at multiple artworks that
relates to recycling
materials/apocalypse and analyzing them as a group.
|
specials collections archive
|
10:45
|
25 mins
|
Table 1:Defense rotation
|
-You
are in a house; zombies are coming to get you! You have 20 minutes to make an
item out of these paper materials that you can use to defend yourself with!
GO!
|
-Newspaper
-an assortment of papers
|
11:10
|
25 mins
|
Table 2:Contraband rotation
|
-Zombies
are attracted to chocolate! You need to make a contraption to hide your
contraband. Think about concealing not only the appearance of the chocolate
but also the smell of it! GO!
|
- Cans
- scissors
|
11:35
|
25 mins
|
Table 3:Power rotation
|
-
You need to make a trap to catch a zombie to see if it can be turned back to
human! GO!
|
- Plastic bottles
- scissors
|
12:00
|
1 hour
|
LUNCH
|
LUNCH
- Take groups of 5 pupils
around the art school.
|
LUNCH
|
13:00
|
25 mins
|
Table 4: Personal object rotation
|
-You
have become a lot weaker due to the radiation and it is now affecting your
mobility. Pick a word out of the box (handicaps –examples, use one arm/ shut
one eye)… This is your handicap! Now make a personal comforting object that
reminds you of home! GO!
|
- natural materials
|
13:25
|
30 mins
|
Defense items
|
- Work in pairs, groups or on your own to
create a defense item.
- can only use paper materials.
|
- newspaper
- selection of card and papers.
- loo roll tubes
- scissors
- string
- masking tape
|
13:55
|
15
mins
|
Stop
rotations: testing products
|
test
all the products made:
what
does it do
how
does it work - demonstrate it
when
would you use it.
|
things the children have made.
|
14:10
|
15 mins
|
Feedback and
completion
|
- Discuss the day, what they have
learnt and what they enjoyed the most.
- Stay in character/scenario
- fill out the feedback form.
- present with the certificate to say
they are fully trained.
|
feedback form
presented with a
“you now have all the skills to
survive a mmu apocalypse”
Certificate.
|
14:25
|
5 mins
|
debriefing
|
- thank them for today.
- explain that they can take things home or
leave them for us.
- clean up
|
Scenario and Table Planning;
A zombie has bitten your arm and you could be infected! For this task keep your arm behind your back to avoid excessive movement as this will only spread the poison!You have got some acid in one eye and must keep it closed while you wait for medication. For this task keep your eye closed for 5 minutes otherwise you might lose it!
You have been infected by a zombie! No one must know so keep your cool, otherwise you could be removed by military officials. Act as normal as possible...
You have become weak from radiation! You cannot work for long periods of time. For this task you can only work for 5 minutes at a time with a 2 minute break before you begin again. Otherwise you might keel over from exhaustion!
You have lost the use of your thumbs from overworking! For this task try not to use your thumbs or you could be in extreme pain!
You know too many secrets and you are scared of being taken in for questioning, choose only one trusted person to talk to during this task. Any more would be too risky!
You have lost your strength from being tortured in prison! For this task you can only pick up items smaller than 5cm, anything bigger would be far too heavy for you to manage!
You are confused and anxious about all the chaos going on and you have become nervous and indecisive! You are terrified for anyone to find out any personal information about you so you must change your personal object 3 times in this task!
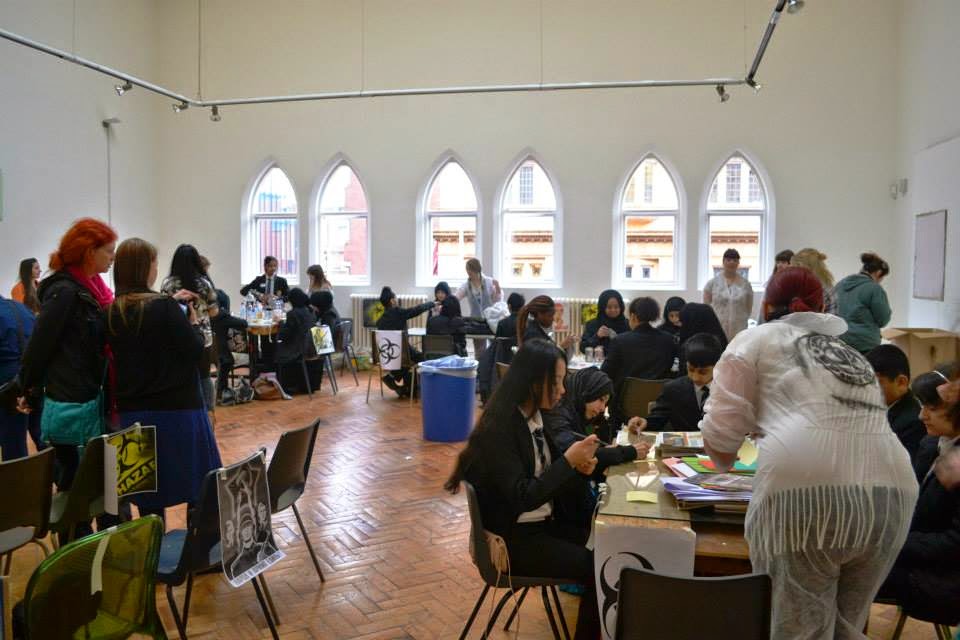
Images from the workshop


Student feedback from the workshop


Lines of enquiry - End of week 4
These last few weeks have been very challenging. I
found working within a group of people I didn’t know at first to be very hard.
I personally always find it difficult to work within a group due to the amount
of views from other people. However, after working within group 4&5 I found
it to be the best group I have ever worked in. The organisational skills within
the group were excellent making the workshop easier and less stressful. Planning
a workshop like this for a group of children wasn’t easy, and I believe opened
my eyes into a different world of planning and organisation. I learnt it is
always better to run through your workshop and it is always better to simply
things to the finest detail to makes sure everything runs smoothly. I also
learnt that when planning a workshop to always have fillers and activities that
you can run just incase things don’t work out timing wise with your plan. Working with the children for me was first of all a scary experience
and I was very nervous. However one we got there set up and began performing
the workshop it went really well, the
children were all really keen to make and create there own individual animal!
It was also really nice to see how excited they were about working with us
aswel. I think within our group we had some difficulties at the start due to us
not being as confident as other groups. I really enjoyed working with this
group and I believe it was the best group work I have participated in whilst
being at Uni. The final outcomes that the pupils had made were also amazing to
see, it brought together all our work and gave us a sense of achievement. It
was also lovely to see how much the pupils enjoyed working with us! Especially
when was was asked 'Can
you come and do this every week!!' By doing this workshop it
really helped my confidence and helped me with my thoughts of becoming a
teacher in the future. It showed me how hard it is to actually prepare a
lesson. The planning for the High school workshop was also challenging as again
this was in an even bigger group. This was for me a lot of pressure as everyone
wanted to have their own say. However we resolved this by splitting into sub
groups that covered all areas of the workshop. This for me was also extremely organised
by the use of facebook. Everyone played a large part into this and everyone was
so efficient with making posters and planning. It was also evident to see that
when in a group this large there does need to be someone to take a superior role
within the group. This workshop also went amazingly and the feedback was lovely
to see. From doing this workshops I particularily enjoyed working within the
primary school more, I think for me this is were my career would lie if I did
want to continue this into teaching. These opportunities so far have been
amazing and very influential. I feel lucky to have had these experiences and
boosted my knowledge so far to how hard it is to be a teacher but also how
rewarding. My confidence has grown and
so have my small ambitions to become a teacher.
Easter Break
Over the Easter break I was offered the amazing opportunity to work along side one of my friends who participates in local workshops within the community teaching dancing. Dancing has been something ive been involved with all my life and to be asked to help teach was a lovely. Being able to work with the children in a 3 day bootcamp was ideal for me as it helped boost my confidence when
working with children. This opportunity has also lead me to be able to help again and gain more experience over the summer. However this isn't my degree field I still think every opportunity within the teaching field is one I should take as it gives me more of an insight into learning and different ways of teaching.
working with children. This opportunity has also lead me to be able to help again and gain more experience over the summer. However this isn't my degree field I still think every opportunity within the teaching field is one I should take as it gives me more of an insight into learning and different ways of teaching.
Stockport Studios
Initially I was worried about coming to the Stockport studios as it was somewhere out of my comfort zone, a new town and it seemed like a little adventure trying to find my way around. When arriving in Stockport after getting 4 trains I finally found my way to the studios. My initial thoughts on Stockport wern't great as it seemed very run down and very quiet. When arriving at the studios it was lovely to see the space and potential that the studio has to offer. I also enjoyed learning about what the council are planning to do to the area to liven up the shops and bring life into this side of Stockport. I was also intregued to know that the spaces above are for sale and it was goo to get knowledge on how much these spaces cost.
Stockport Workshop/Mini Brief
Firstly we were given just oven an hour to explore Stockport and pick up on key things that stood out to us and from these design a workshop that could be held in the studios during the creative festival. However it being a Monday most of the shops were closed and it was hard to gain inspiration. We were given the option to work alone or in groups. I chose to work with a close friend Rebecca Worrall who I knew well from my course. We initially picked up on the amount of charity shops in the area and the large variety of vintage jewelry. From this we researched into what Stockport was famous for. As textiles students were both very hands on with our practice and something that stood out to use was making jewellery. We found whilst researching Stockport was very famous for its rope making. We researched further into rope making and found if you was a talented knotter you would have fitted in perfectly with working in a mill in Stockport.
So for our hour long research/planning session we came up with a workshop that concluded all the research we had found. We wanted to create a mill like atmosphere in the studios and create jewellery based on the knotting idea. So for example creating small unique pieces that involved rope, chains fasteners. This would be perfect for all ages and would give people a chance to be creative and take there pieces home with them.
Making a workshop plan
Email Proposal to Claire with the plan
Hi Claire,
Me and Amy Bamford would like to deliver a knot jewellery workshop on the Friday evening only.
The plan
Name of workshop: Knotport Jewellery Making Workshop
Projected images of Stockport's mills, rope and knot history will be projected on the wall. (projection equipment needed).
Whilst images are being projected we would like people to attend a simple but effective jewellery making workshop.
Where they will have a choice of different knot techniques to pick from. We will then help with making knots, clasps, and glue gunning. we can also offer key ring making for males or smaller children who do not want to create jewellery.
Me and Amy will also be making whilst the workshop is on and will maybe sell some of are pieces at Stockport fair.
Whoever attends will get to take there pieces home and will receive a Thankyou letter/card for attending. If they would like to leave there pieces with us we will sell them with are pieces at the fair.
The thank you letter/business card will explain, what we are trying to do in this Stockport area. How we are trying to regenerate it.Also to say well done for taking part In are workshop :)
Shopping list
- Two different thickness of rope - thicker one for smaller participators.
- All Jewellery findings E.g clasps, crimp plates etc....
- Glue gun and glue
- Plyers and cutters
- Scissors
- Powerpoint of images and facts for projection.
- Printed work knot techniques.
- Thank you letter/ business card.
This is all the info we've come up with so far. If it ok to deliver we will start ordering some stuff when you've confirmed the workshop.
Researched Knot Techniques between me and Rebecca using social media as our way of swapping information
Unfortunately due to the building not being ready for the public yet this workshop had to be cancelled.
However me and Rebecca were very excited and keen to run this workshop as it would have been fun and given us more experience.
Microteaching Brief
Task
-Deliver a short workshop based upon your practice and receive feedback
-Plan a 10-minute (maximum) session that you will deliver to a small group of your
peers and a tutor.
-Participate in the your peers’ teaching sessions and provide feedback
-All feedback is completed by participants and tutors within the session.
Introduction
For my micro teaching brief I wanted to do something
that reflected my practice. I have chosen to use digitally printed images of
your drawn self portraits. Everyone in will participate in this to create a
2015 class wall hanging for the art school.
I wanted to create something that I have always
remembered creating in school which was a self portrait tea towel.
For this I am
going to give you a pen as your only material, you will have approximately 6
mins to create your portrait.
Your self portrait can be done in many ways, you can
draw yourself literally for example like Van Gogh, you can do cartoon portraits
like Quentin Blake or you could try other ways or drawing, such as typography
were you use words to describe yourself. You can use help from the examples in front
of you or you can be as creative as you wish as long as you stay inside the
box.
After all the images have been drawn I want to put
them all on the desk in alphabetical order to as a small example of how they
would look as a wall hanging for the art school.
Lesson Plan
Microteaching
Session Title: Self Portrait
|
Date: 13/05/2014 Time: 10:30am Location: Stockport Studios
|
Microteaching
Learning Outcome (Key Aim) :
The key aim of this micro session is to see how people
portray themselves and their personalities differently when drawing a self
portrait using limited resources. When the portraits have been done they will
be digitally printed to create a class of ’15 wall hanging for the art
school. Key aims are to introduce examples of digital printing, give brief
knowledge of artists and show how everyone portrays themselves and works
differently.
How will you know
that this learning has happened?:
A range of different portraits that can be joined together
to create a unique piece showing peoples individualities and personalities.
|
Approaches to
Learning :
Introduction: Theory based using artist references and
back ground information
Delivering the workshop: Practical/Theory based using
provided equipment to draw or explain their personalities in the box provided
using influences from the information given in the introduction ( Artist
references)
|
Inclusive
Practice:
During the practice, the students will be asked to create
a self portrait of themselves in the space provided with one piece of
equipment. This workshop is very open due to the students being able to
create a self portrait however they wish, for example drawing, using words or
documenting feelings.
|
Time
|
Content
|
Teacher
Activity
|
Student
Activity
|
Resources
|
2 mins
|
Introduction to
portraits:
-
Artist information
-
Examples of portraits used in a year group
-
Explanation of final piece
-
Explanation of materials
|
Explanation of workshop
|
-
Artists images
-
Example images of
Portraits used in year groups
and examples of digital printing used within textiles for wall hangings
-
Materials and equipment
|
|
6 mins
|
Practical
-Using a the pen provided students will create a version
of their own self portrait using influences from the introduction or their
own creativity
|
Working within the workshop creating there self portrait
|
-
Pre printed worksheets
-
One black biro per student
-
Pre printed examples and artists research for
help
|
|
2 mins
|
Reflection of
work
-
Place all images on the table to see how
different students portray themselves differently
|
Reflection of work, looking at each others work and
getting a sense of how other people work and express themselves
|
Worksheet


Delivering this workshop even though it was to my peers was still scary. Throughout the unit I havent really had to speak alone in front of a group of people and this is something I have always struggled with. I structured my teaching plan so I would have everything organised to make it easier for me. During this course I have learnt that to do this job you have to be organised and precise and always have a back up! Being second to deliver my workshop didn't help my nerves and after I had started I realised it wasn't as scary as I had initially thought. It has helped boost my confidence and having feedback back from my peers who were in the same position as me was good. By doing the workshop it again reiterated what I had learnt earlier in the course that it is always good to practice and run through your lesson plan to every detail just incase. My timings were a little long and during the workshop I realized that 6 minites for drawing even though my audience was older was to long.. however the feedback from the group gave me ideas that would help and again it boosted my confidence that I have the ideas and the skill there to potentially be able to deliver a workshop one day.
Feedback
The feedback from my peers was the most useful part of this task.
The first point made was that it would have been nice to be able to see examples of my own work.. for example I am a digital print/embroidery student however the people i'm delivering this workshop to probably wont know much about digital print. This would have been a good opertunity to make the workshop more educational and would have helped reach the brief.
Another good idea of how I could adjust my workshop and something I even noticed myself was that 6 minites was far to long to just be drawing. Instead of drawing however you want it would have been good and more educational if I had used the artists as influences. For example, 2 minuets per artists, draw for 2 mins in the style of van gogh, 2 mins in the style of Quintin Blake. This again would have been more influential to the students as they would have learnt different styles of drawing and it would have been done in a self teaching style by observing.
However these were small things I could have adjusted I had good feedback from my peers that I was, well organised, well prepared and it was nice to see how I would have taken everyones images and styled them as a digitally printed wall hanging.
Overall I believe the workshop went well, I learnt alot and everytime I push myself to do something out of my comfort zone I learn alot more. That is something key I have learnt from this course so far that the more you push yourself to do things you wouldnt normally do the more you learn and the more your confiidence builds.
Reflection By the submission deadline.
During the course of this unit I have made many
discoveries that have helped boost my practice. I initially thought the unit
would be mainly about learning and teaching in schools. However as the unit was
very open it opened my mind to different areas of teaching that I had never
really thought about, it also brought back memories from being a child in a
workshop environment in school. If anything it reminded me why I am doing the
course I am doing as I was influenced at a young age by taking part in
countless workshops and community groups creating things for the area. Before
this course I had a limited mind. I thought I could either leave my degree and
work within a design company or I could go to a high school or a college and
teach my practice of textiles. However whilst doing this unit I have realised
how much I would love to work within the community and how I think my third
year work could be very involved with the community and how I think I could expand
my practice. The most influential part of the unit was being able to learn in
depth about Lynn Setterington. Her work within the community is inspiring and
is something I am going to expand on in my final year. I believe sharing your
skills and getting people involved with your work is something that I would
love to do.
The unit itself being group based was difficult.
Usually I work alone and never really have contact with anyone else on my
course unless its during tutorials with tutors and a small amount of peers. I
believe that working within these groups very influential on my learning. I
also discovered what ever I plan to do when I leave my degree I most probably
wont get the chance to work alone and it will always be in a group format whether
it be I’m working in a design company or a school or delivering workshops. It
was difficult to star working within groups as we are all creative students
were all very imaginative and have a lot of ideas and sometimes these clashed. I
believe I did find it hard to express my opinions and my ideas and sometimes I
sat back and let people take the lead. I personally think this is a clash of
personalities and confidence. However towards the end of the course my
confidence was a lot stronger and I knew my peers more to be able to express
myself. This is something I have learnt from that no matter how hard it is to
express your ideas you should always do so as now I regret not being involved
as much as I should have. I also believe during this unit something i lacked was research into artists and other influential people like Lynn Setterington. Reflecting back now I should probably have researched more into there styles of working and gained a broader knowledge.
I believe the planning of every workshop was amazing
due everyone on the uni being very dedicated and involved. I believe everyone
was really hard working and wanted to do well which brought everyone else up
with them, this was another bonus and confidence boost when working within a
group due to the last groups ive worked with not pulling there weight. I believe
the delivery of all the workshops went well. My favourite workshop was Holy
Name Primary School, this was the workshop I was most nervous for however due
to the amazing planning and organisation within my group it went amazingly from
the choice of materials for the workshop to the delivery of the workshop.
I achieved a lot of learning throughout this unit,
from how to plan a lesson to how to
deliver one. I believe that this has been the most influential part of my
course so far this year as I learnt a lot more about the outside world instead
of heavily concentrating on my practice all the time. I have learnt different ways
in which I could evolve my practice once I graduate and how many options there
are for me to take. One aspect of the unit I was disappointed with was myself
and my attendance due to being ill I missed the opportunity to work within a
high school, this is something regret as it would have given me even more experience
for later in life. However over summer I am planning on working with children
teaching dancing, and have been offered a part time job within a dance school
as a dance teacher teaching all ages. Even though this is out of uni and is
something I do as a hobby along side textiles it gives me more experience and helps
boost my confidence more for the days when I may choose to teach.
I believe
this course has helped me choose which direction I would want to go within
teaching and that would be primary school. The primary workshop we delivered
was a lovely day and all the children were so keen and happy we were there it
gave us all a sense of achievement that they enjoyed something we had took so
much time to prepare for. I have really enjoyed this unit and I believe it has
made a large difference to the way I am going to work within my practice in the
future.
No comments:
Post a Comment